Recipes » Lunch

Can’t find what you’re looking for? Try our enhanced search. 🔎

More to Explore

Healthy DIY Pizza Lunchables {10-Minute School Lunch}

Back-to-school lunches always sound simple in theory. Then you’re standing in the kitchen trying to pack something your child will actually eat, that won’t leak everywhere, and that has enough staying power to get them through the afternoon. This Healthy DIY Pizza Lunchables recipe is one of my favorite solutions!

Crackers, mozzarella, pepperoni, and marinara give kids the fun of assembling their own little pizzas. Add fruit and vegetables on the side, and you have a balanced school lunch with protein, fat, fiber, and carbohydrates. The basic Pizza Lunchable provides an estimated 14 grams of protein and 28 grams of carbohydrate before the optional fruit, vegetables, and treat are added. 

This is also one of my favorite school lunch ideas for kids living with diabetes because every ingredient is packed separately. That makes it easier to check labels, measure portions, and calculate the total carbohydrate for your child’s individualized meal plan. And it takes about 10 minutes to prepare, which is exactly the level of effort most of us can manage on a school morning!

Homemade Lunchables are really just a kid-friendly version of a snack meal. My five-minute snack lunch and snack dinner guide has a simple formula for building more combinations!

This post was sponsored by Sprouts Farmers Market. All thoughts and ideas are my own.

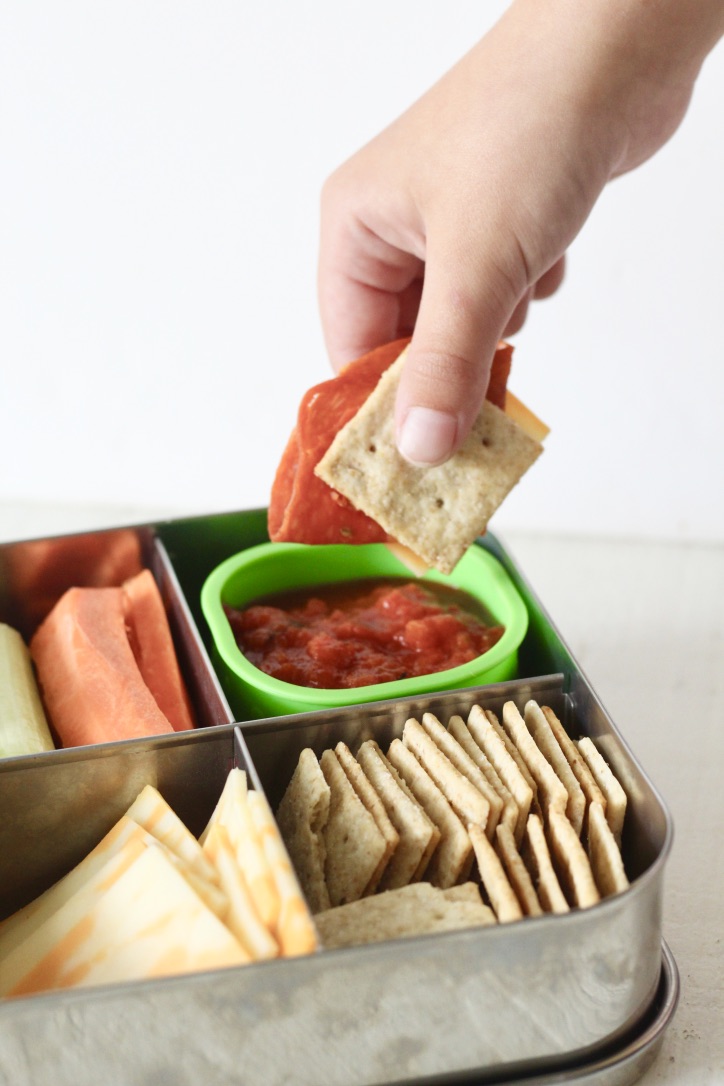
child's hand dipping crackers and pepperoni in pizza sauce for punchable in stainless steel container

Before You Get Started

  • Choose a divided, leakproof container. Keep the marinara in its own tightly sealed compartment or small container so the crackers stay crisp!
  • Check the cracker serving size. Cracker sizes and carbohydrate amounts vary quite a bit. Count out the portion listed on the package instead of estimating by handful.
  • Use foods your child already enjoys. Start with familiar ingredients, then add new foods in small amounts.
  • Consider your child’s appetite. Younger children may need fewer crackers or toppings, while older children may need extra protein, fruit, or another side.
  • Review the full lunch when counting carbohydrates. The original nutrition estimate covers only the crackers, sauce, cheese, and pepperoni. Fruit, vegetables, drinks, and treats need to be counted separately when relevant.

What You Need to Make DIY Pizza Lunchables

  • Crackers: Almond flour crackers work well because they are sturdy enough for dipping and topping. Whole-grain crackers are another great option for DIY Lunchables with whole-grain crackers and can add more fiber. I love Simple Mills Almond Flour Crackers and they’re often on sale at Sprouts!
  • Marinara sauce: Choose a sauce your child enjoys and place it in a leakproof container. For a lower-sugar Pizza Lunchable recipe, compare the added sugar and total carbohydrate amounts on the Nutrition Facts labels.
  • Shredded mozzarella: Mozzarella provides protein and gives the lunch that familiar pizza flavor. Small mozzarella cubes or cheese slices can also be used.
  • Pepperoni: Use four or five large slices of your preferred pepperoni. Turkey pepperoni also works if your family enjoys it. I like the freshly sliced kind at Sprout’s deli!
  • Vegetables: Carrots, celery, cucumbers, mini bell peppers, and snap peas are sturdy lunchbox choices. Pack one or two your child reliably eats.
  • Fruit: Blueberries, apple slices, grapes, strawberries, or mandarin orange segments add color and another carbohydrate source to the meal.
  • Optional treat: Add a small treat based on your child’s appetite and usual meal plan. Packaged options make carbohydrate counting especially straightforward because the serving information is already available. For something sweet to add on the side, choose from these healthy no-bake lunchbox treats!
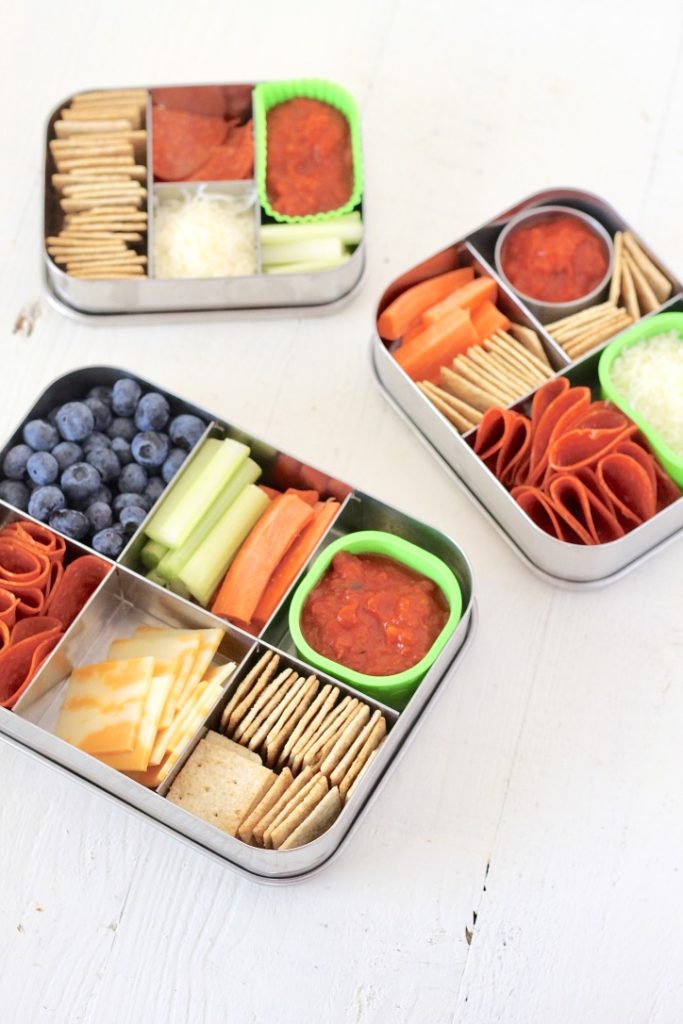
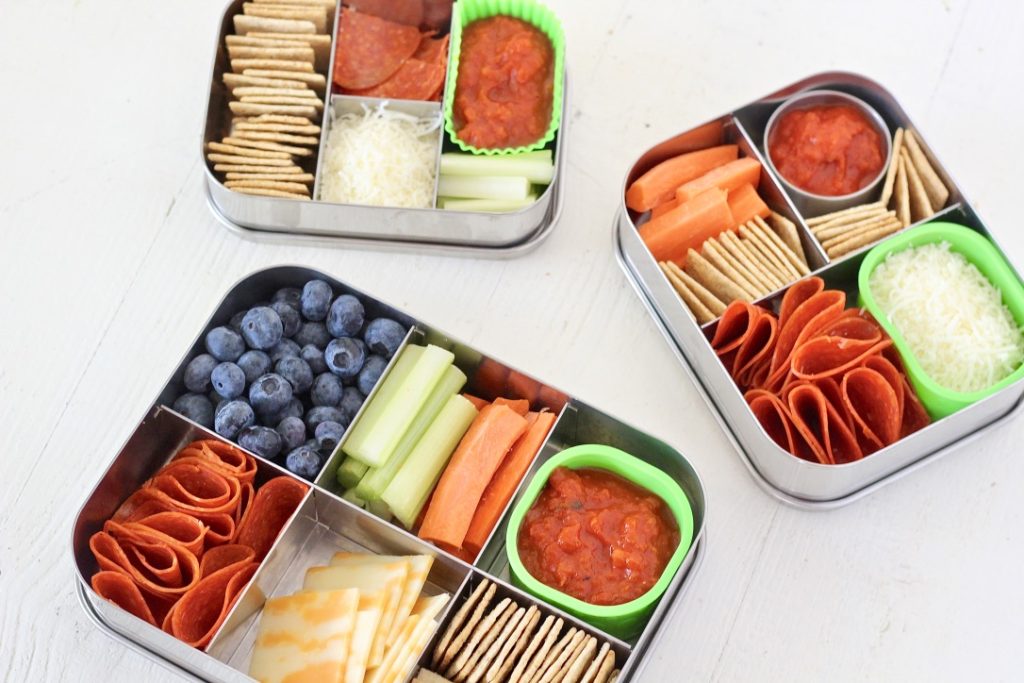
three kids bento box lunches

How to Make Healthy DIY Pizza Lunchables

Portion the Pizza Sauce

Add the marinara sauce to a small leakproof container or one section of a divided lunchbox.

Secure the lid before placing it next to anything you hope will remain tomato-free.

Add the Pizza Toppings

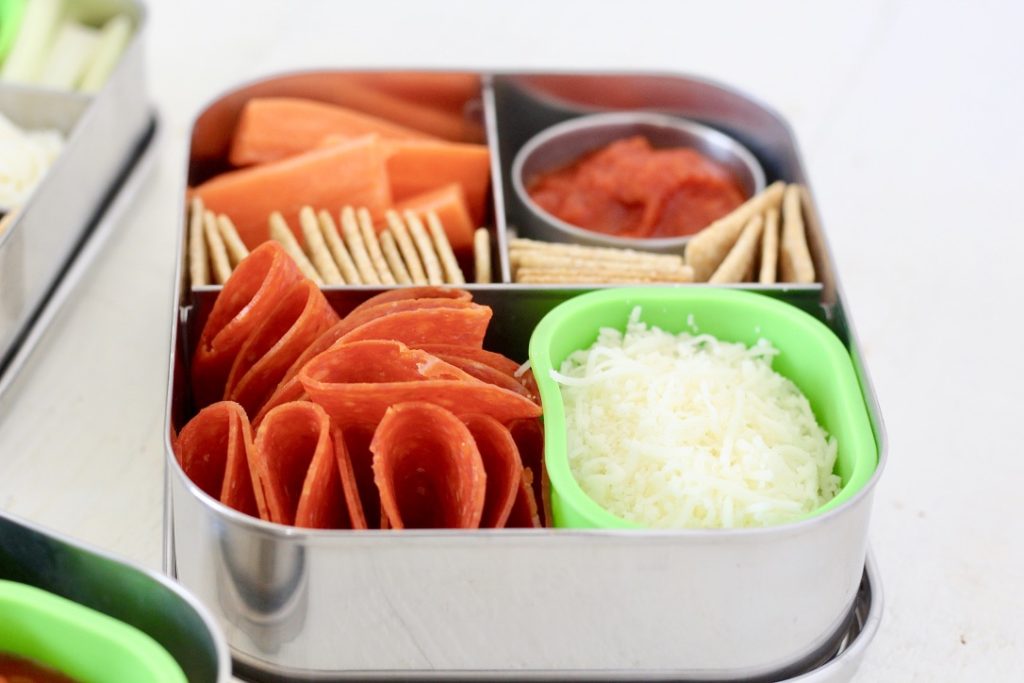
Place the shredded mozzarella and pepperoni in separate compartments.

Your child can dip the crackers into the sauce, sprinkle cheese on top, and add pepperoni to make mini pizzas at lunchtime.

Pack the Crackers

Count out 10 to 12 crackers, or use the serving size listed on the package.

Keep them in a dry compartment away from the sauce, fruit, and vegetables.

Add Fruit and Vegetables

Fill the remaining sections with your child’s preferred produce.

You can also include extra marinara, hummus, or another dip if that makes the vegetables more appealing.

Seal and Refrigerate

Close every compartment securely and refrigerate the Lunchable until it is time to leave.

Pack it in an insulated lunch bag with cold sources to keep the cheese, pepperoni, sauce, and cut produce at a safe temperature until lunch. USDA recommends placing at least two cold sources around perishable foods in a packed lunch. 

kids pizza bento box in stainless steel bento box

Variations and Substitutions

  • Use whole-grain crackers: Look for a sturdy cracker that can hold the sauce and toppings without breaking.
  • Try mini pitas: Small whole-wheat pitas or pita wedges make the lunch feel even more like pizza.
  • Use turkey pepperoni: Swap the traditional pepperoni for turkey pepperoni if your family prefers it.
  • Add another protein: Include a hard-boiled egg, turkey slices, Greek yogurt, or extra cheese for a larger lunch.
  • Make it vegetarian: Leave out the pepperoni and add olives, chickpeas, or another cheese your child enjoys.
  • Make it dairy-free: Use a dairy-free shredded cheese and check the cracker and pepperoni labels.
  • Change the sauce: Pesto or hummus can replace the marinara for a completely different snack-style lunch.
  • Pack it for an adult: Increase the portions and add a larger serving of vegetables, fruit, or another protein source.

Helpful Tips

  • Pack the crackers separately. Even divided containers can collect condensation. A reusable snack bag or small sealed cup keeps crackers crisp until lunch.
  • Use silicone cups inside larger containers. They create extra compartments and help keep shredded cheese, fruit, and pepperoni from migrating across the lunchbox.
  • Let your child help choose the sides. Give them two or three reasonable options and let them pick. A little ownership can make lunch much more appealing.
  • Cut foods into manageable pieces. Slice larger pepperoni, fruit, and vegetable sticks based on your child’s age and eating skills.
  • Keep a short list of favorite combinations. Once you know which crackers, fruits, vegetables, and treats work well, rotate those options instead of reinventing lunch every morning.
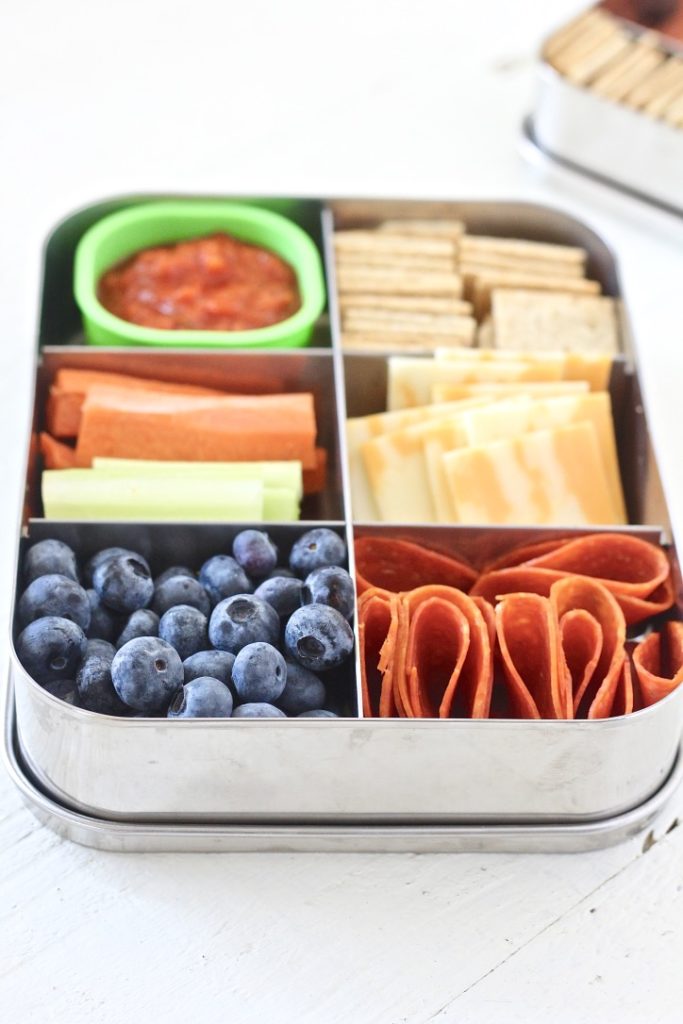
large bento box lunch

What to Pack With Pizza Lunchables

Not sure if your kid will fill up on just the DIY Pizza Lunchable you made? There’s lots of other yummy low sugar options at Sprouts. They’ve got everything you need for back to school snacks and lunch time. I wrote this article on my favorite low sugar school lunch options that they carry!

You can also add one or two sides based on your child’s appetite and nutrition needs.

Try:

  • Apple slices with peanut butter or sunflower seed butter
  • Berries or grapes
  • Mandarin oranges
  • Carrot or cucumber sticks
  • Mini bell peppers
  • Snap peas
  • Unsweetened applesauce
  • Greek yogurt
  • A hard-boiled egg
  • A small no-bake snack bite
  • Popcorn for older children
  • A milk or water

For a child living with diabetes, calculate carbohydrates using the exact brands and portions you pack. Carbohydrate needs and insulin plans are individualized, especially for growing children, so follow the plan provided by your child’s diabetes care team. 

Protein, fat, and fiber can slow digestion when eaten with carbohydrate foods, which may support a more gradual blood sugar response. 

Need more easy sides to rotate through the school year? Browse my favorite low-sugar lunchbox staples!

Storage and Packing Instructions

You can portion most of the lunch the night before. Refrigerate the sauce, cheese, pepperoni, fruit, and vegetables in sealed containers.

For the crispest texture, add the crackers to the lunchbox in the morning or keep them in a separate sealed bag.

Place the Pizza Lunchable inside an insulated lunch bag with at least two cold sources. A frozen water bottle or juice box can count as one source when paired with a frozen gel pack. Position one cold source above the food and one below it. 

If a refrigerator is available at school, the lunch should be refrigerated upon arrival. Perishable leftovers that have been sitting unrefrigerated through the school day should be discarded rather than packed up again for tomorrow’s lunch. 

three bento boxes stainless steel containers

Frequently Asked Questions

Can I Make DIY Pizza Lunchables Nut-Free?

Yes! The almond flour crackers in the original recipe contain tree nuts, so they may not be appropriate for a nut-free classroom or school.

Replace them with whole-grain crackers, gluten-free rice crackers, mini pitas, or another school-approved option. Always check package labels and your school’s current allergy policy.

How Do I Calculate the Carbohydrates for a Child Living With Diabetes?

Use the Nutrition Facts label for every packaged ingredient, including the crackers, sauce, cheese, pepperoni, treat, and drink.

Measure unpackaged fruit using the serving method recommended by your child’s diabetes team or a trusted carbohydrate-counting resource. Add each source together to find the total carbohydrate for the lunch, then follow your child’s individualized insulin plan. CDC guidance notes that carbohydrate counting can help match mealtime insulin to foods and drinks. 

Can I Use Mini Pitas or Tortillas Instead of Crackers?

Yes. Mini pitas, pita wedges, small tortillas, or toasted English muffin pieces can all serve as the pizza base.

Check the serving size and total carbohydrate because these options may contain more carbohydrates than the cracker portion in the original recipe.

Can Homemade Pizza Lunchables Be Eaten Cold?

Yes. The ingredients are intended to be served cold, so your child does not need access to a microwave.

The lunch still needs to remain properly chilled because it contains cheese, pepperoni, sauce, and cut produce. Use an insulated bag and cold sources until lunchtime. 

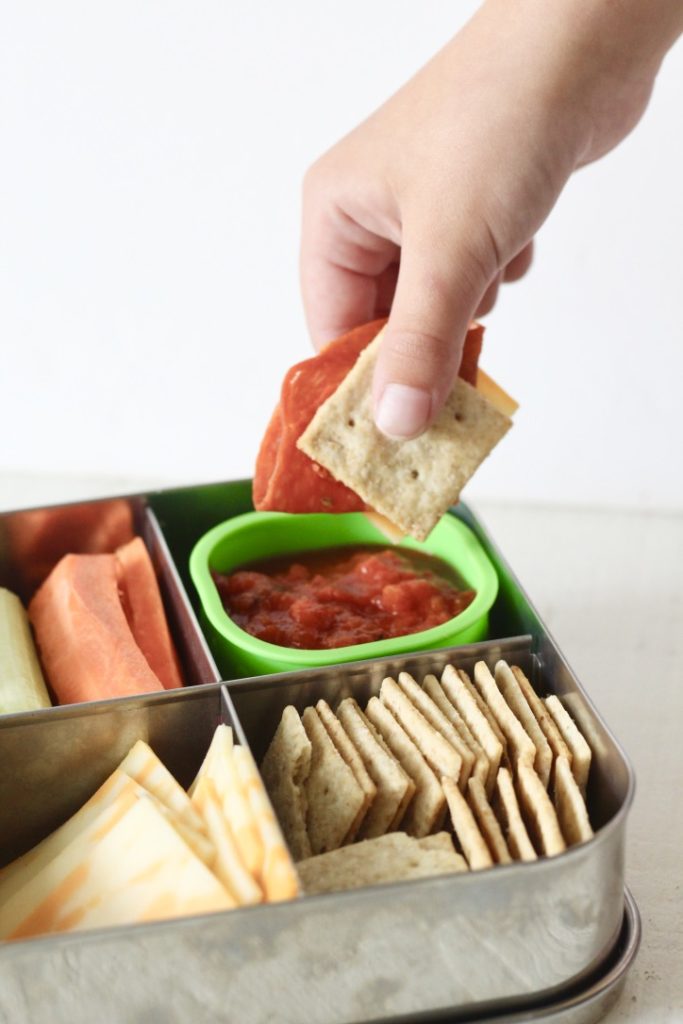
Hand dipping pepperoni, cheese, and a cracker into pizza sauce from a DIY pizza Lunchable.
These homemade Pizza Lunchables pair crackers, marinara, mozzarella, and pepperoni with fresh fruit and vegetables. They take 10 minutes to pack and make a fun, balanced school lunch for kids!
Print Recipe Pin Recipe

Rate this recipe!

No ratings yet
Prep Time: 10 minutes
Total Time: 10 minutes
Course: Appetizer, Main Course, Snack
Cuisine: American
Diet: Diabetic, Gluten Free
Keyword: back to school, lunchable
Servings: 1 lunchable
Carbohydrates: 28g

Ingredients

  • 10-12 Simple Mills almond flour crackers
  • ¼ cup Sprouts brand marinara sauce
  • â…“ cup shredded mozzarella cheese
  • 4-5 large uncured pepperonis I found some at the Sprouts deli counter
  • Veggie sticks carrots, celery, etc.
  • Fruit blueberries, apples, etc.
  • Low Sugar treat see examples above

Instructions

  • Simply arrange the ingredients as shown in the photos above and you’re good to go! Make sure you have your containers fully sealed to prevent leaks if needed and your kids will be thrilled with their delicious DIY Pizza Lunchables!
Notes

  • The nutrition estimate covers the crackers, marinara, mozzarella, and pepperoni only.
  • Fruit, vegetables, drinks, and treats need to be calculated separately. Cracker and sauce nutrition varies by brand, so use the labels from the products you pack.
  • Replace the almond flour crackers if your child attends a nut-free school. Keep the sauce tightly sealed and separate from the crackers.
  • Pack all perishable ingredients with cold sources.
Storage:
  • You can portion most of the lunch the night before.
  • Refrigerate the sauce, cheese, pepperoni, fruit, and vegetables in sealed containers.
  • For the crispest texture, add the crackers to the lunchbox in the morning or keep them in a separate sealed bag.
  • Place the Pizza Lunchable inside an insulated lunch bag with at least two cold sources. A frozen water bottle or juice box can count as one source when paired with a frozen gel pack. Position one cold source above the food and one below it!

Nutrition

Serving: 1lunchable | Calories: 315kcal | Carbohydrates: 28g | Protein: 14g | Fat: 16g | Saturated Fat: 6.5g | Sodium: 929mg | Fiber: 3g | Sugar: 8g
Tried this recipe?Mention @milknhoneynutrition or tag #milknhoneynutrition!

More to explore...

2 Responses

  1. Mary Ellen. Thank you for all you do here! Where do you get your bento boxes?

    Big fan from Babylon NY
    Beth Swaine

Leave a Reply

Your email address will not be published. Required fields are marked *

Recipe Rating


This site uses Akismet to reduce spam. Learn how your comment data is processed.

This site uses cookies to help improve your user experience. You acknowledge your acceptance by clicking Accept. Read our Privacy Policy here.